Things about Cabinets Installation
Table of ContentsThe Best Guide To FlooringLittle Known Questions About Door Handle.The Only Guide for Handyman Near MeThe Best Strategy To Use For Flooring
Apply a stripe of covering up tape above as well as listed below where you're using your caulk this will certainly provide you a clean, even-looking line - Furniture assemble. Take your tube of caulk there are numerous kinds, yet selecting one with silicone will certainly provide you much better mold protection as well as lots it into the caulking gun, complying with the instructions on the package to cut open the application suggestion as well as seeing to it that you pierce with any kind of additional layer of packaging inside.

Keep revolving the serpent up until the resistance passes, then pull it out whatever's plugging up the sink will likely bring out it. Run water to guarantee that the blockage has actually passed. If it's still obstructed, then the issue most likely runs deeper. Under your sink, get rid of the straight pipeline that connects the catch to the stub pipeline in the wall, either by hand or using a pipeline wrench.
When you've gotten rid of the issue, pull back the wire from the stub pipeline and also re-attach the trap and also straight pipe. If you don't stay in a house, your empire (as well as its upkeep) might well expand out into the driveway - Door handle. Regretfully, fractures in concrete and also asphalt are a reality of life ones that, left unaddressed, will become a full-on holes.
An Unbiased View of Handyman Near Me
Yet if they're on the very first flooring, you need to have the ability to manage this on your own. Obtain up on a ladder, making certain it's secure. You can use a stand-off, or ladder stabilizer, to prevent damaging the seamless gutters or residence exterior siding. Initially, use a trowel to remove dead fallen leaves and also various other debris that's accumulated in the seamless gutters, accumulating it in a pail or trash can.
Find and get rid of any kind of loose screws in the joints. For each and every useful source gotten rid of screw, take a wood matchstick, dip it in carpenter's glue, as well as drive it into the screw opening, then damage or reduce off any type of part of the matchstick that sticks out. Drive each screw back right into the covered hole, and the matchstick-glue combo needs to hold it safeguard.
The anchor also requires to match the size of the screws you're making use of, as well as these should be at least 1. 5 inches long to protect your hanging - Handyman services. Pierce or hammer your pilot holes where you intend to hang something the much heavier the item, the more anchors you'll require to hold it up.
All About Cabinets Installation
Unscrew both screws in the deal with's face plate (the item that solutions the door to the door jamb), handle plate (the item that solutions the handle to the door) and also strike plate (the item in the door jamb with a port for the lock). Draw the manages off both sides of the door, slide out the face plate and also pawl as well as get rid of the strike plate.
Complete it off by screwing on the strike plate. Heater filters need to be altered at the very least every 3 month and much more often if you smoke in your house or have animals that dropped heavily. First, get rid of the vent cover depending on the heater design, this will either be a huge ventilation grate in the wall, flooring or ceiling or else in the heater itself.
Place the old filter straight in a trash can local handyman needed (or else it'll spread dirt anywhere), after that slide in the new filter, ensuring it faces the right instructions, and change the vent cover. Remove the home window frame as well as lay it on a level surface area. Pry the old screen out of its framework.
The Ultimate Guide To Paint
Roll the brand-new display over the top of the frame, after that sufficed to make sure that there's one inch of added display around the frame's sides. For a wood frame, utilize a hammer or staple gun to attach the stretched display to the beyond the frame. For a metal or plastic structure, utilize a spline tool or putty knife to require the spline as well as the screen into the home window groove.
Apply lines of painter's tape wherever there is an edge that isn't being repainted the floor, around the ceiling and also any wall surface you do not wish to be on the same shade. Take some treatment with this, as unequal or quickly applied tape will certainly create a careless line to your paint.
For the wall surfaces themselves, you should utilize a roller. First wet the roller, then dip it into the paint colour and roll it in the paint try up until it's equally layered. Use the paint around the walls in M and also W-shaped movements, after that allow the paint completely dry. A commode that "runs," or where the tank is constantly replenishing with water, is one of the most convenient handyman repairs.
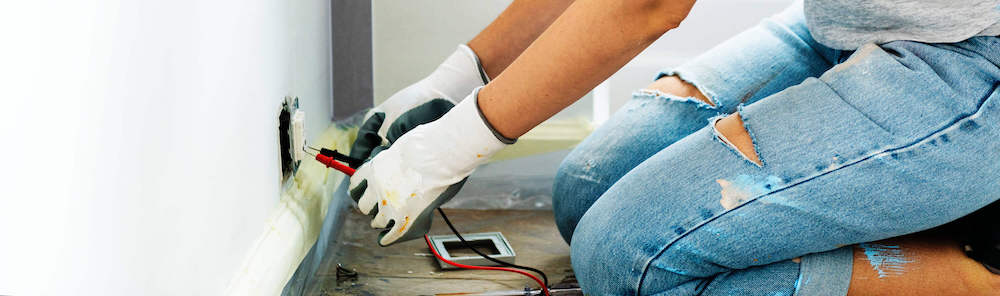
Utilize a Phillips screwdriver to unscrew the cables from the button, then read review cut the cable connection or use needle-nose pliers to eliminate the cables from the terminals. Get rid of the insulation from each cable with cord pole dancers, and also make use of needle-nose pliers to make a little loophole at the end of each cable.